


It's pretty impressive in my mind that all of the printed fabric (except the binding) came from ONE charm pack. It sure made this quilt pretty simple to assemble.
To make my prairie points, I cut a 5" charm square in half horizontally and vertically, giving me four 2.5" squares. Take one 2.5" square and fold it in half, creating a triangle shape (not rectangle) with wrong side together. Then fold again, creating an even smaller triangle. Now all your raw edges will be along one side of the folded triangle. Do this about a thousand times more to have enough triangles/prairie points to go all the way around your quilt.
Now here is my take on the prairie points. They take forever to cut and fold! So so long. Then you have to pin them in place along the border, making sure that they are all equidistant apart and fit perfectly along the length of the border (this took several attempts of pinning, unpinning, and re-pinning.) Again, this part also takes a really long time.
So basically, they take forever to make.
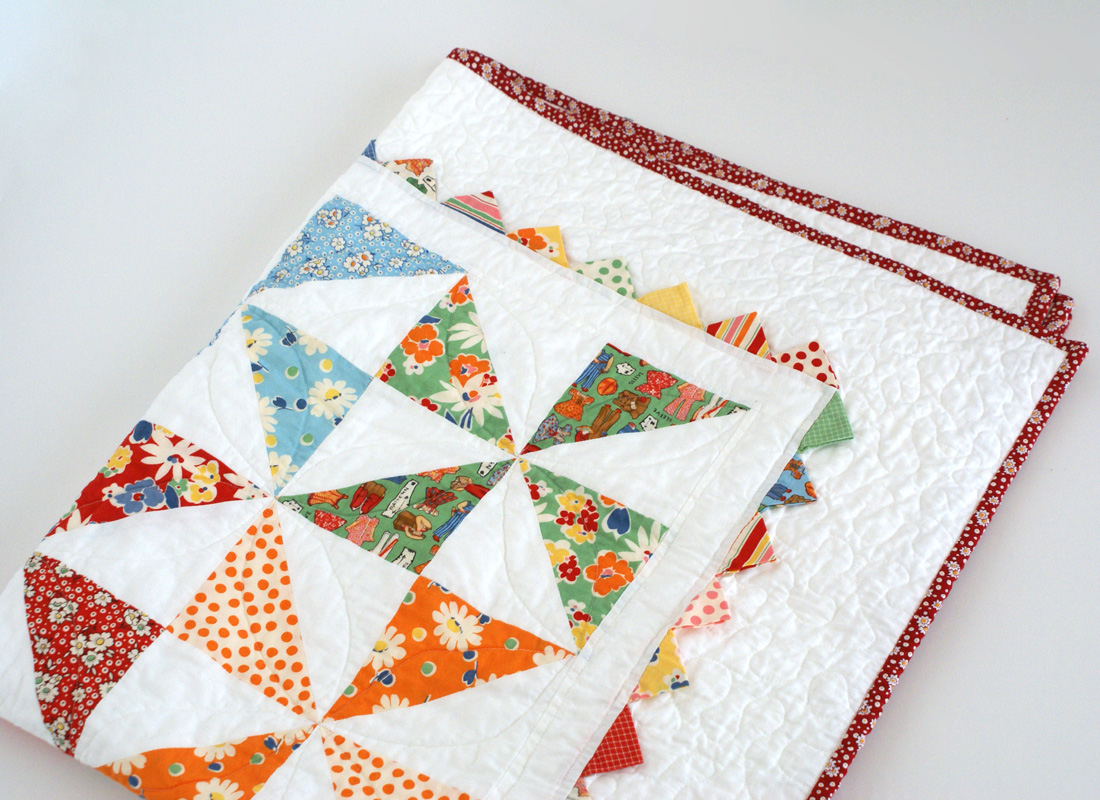
I think they really made this quilt and I wouldn't have done it any other way. But I'm not sure I love the way they look. The picture below is what they looked like after coming out of a wash/dry cycle...so wrinkled, squished, and puffy. I had to go through an iron them all down again. Definitely not something I'd want to do after every wash. Plus, ironing the prairie points down also means ironing down some of the nice crinkly quilting that you want to keep.

And lastly, the issue with quilting around them. I tried ever-so-slightly raising them up and quilting as close as I could, but that ended up being the worst idea. I tried really hard to not pull at the border fabric while doing this, but I didn't do as good of a job as I thought, seeing as how there is now a little extra bulk of fabric under the prairie points, making them poof up slightly.

I do love the effect prairie points give to a quilt. And I won't say that I'll never do them again. But if I do, the quilt will be one that is pretty important to me to spent the time a effort on them.
If there is a next time, there are a couple of things I'd do differently. First off, not quilt so close to them. Just quilt around them. And second, I would stitch in the ditch along the edge of the border (right on the seam where the prairie points are sewn in) to try and help keep them laying more flat.


Thanks for the tips. I can see me wanting to do this pattern at one point, so knowing what you learned the first time around is very helpful! They really are pretty though....
ReplyDeleteI've been showing off the quilt to everyone who comes to visit us and everybody just oohs and aahs over all of the details- especially the prairie points! So your hard work definitely paid off and they really do make the quilt. But I don't know how you have the patience for quilting! But you have a gift for it so it's a good thing.
ReplyDeleteI agree, you have a gift for quilting...I like the p.p.s but they do sound like a lot of work!
ReplyDeleteI think the prairie points are fantastic and I am quite impressed!
ReplyDelete