I met a really nice lady while visiting Country Stitches on the North Texas Quilt Shop Hop and she informed me of the shop's really-great-amazing Block of the Month that was starting in October. If you are not familiar with doing a "Block of the Month" program, they usually consist of a total of 12 blocks to complete a quilt top. Each month you come in, pay the fee (usually around $5-10 each month) and are provided the fabric and block pattern. I've never participated in one myself because, for one, I always miss the start, and two, they are usually Civil War revival stuff, which is definitely not my style (you know, that super dark maroon, navy, and dark beige look).
Well all my inhibitions went out the window when this lady told me that you pay $5 for the first block, and if you finish the block by the next month, they give you the next month's block free. And then if you finish that one, you get the next one free, and so on and so on. So you could basically get an entire quilt top for just $5!! I couldnt believe it. So I figured I join, no matter what it looked like and I could at least give it away as a gift to someone who would like it.
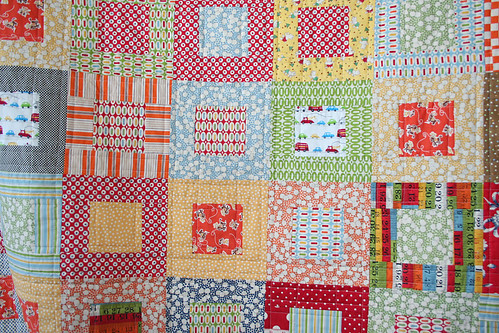
I was completely surprised when I found out that they were offering this cute, bright 30's reproduction. I love the bright colors and the intricate blocks...because you know I would never put the time and effort into designing blocks like these. I think one of the great things about joining a club or program at a quilting shop is that it gets you to step out of your comfort zone and try something new.
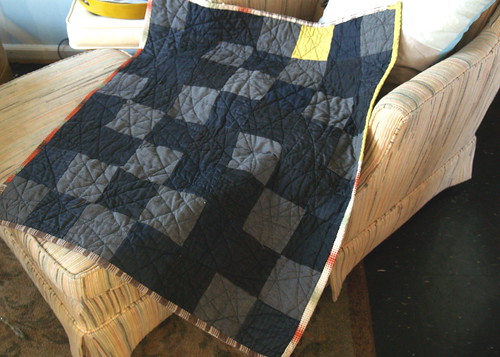
So here are my blocks for the 1st and 2nd month:
This is how we receive our blocks each month - a little baggie with the fabric pieces and directions for cutting and piecing the block.
It's kind of silly, but I get really excited at the beginning of each month to go in and pick up the new block. Maybe it's getting to peruse around the quilt shop for fun. Maybe it's the anticipation of a new mini project to work on. Or maybe it's just the "me" time, being able to do something I like, alone, without chasing a 2 year old around running and screaming.
Wednesday, December 30, 2009
Wednesday, December 23, 2009
Last Minute Christmas Gifts with tutorials
I just wanted to drop in one last time before the holidays and give you guys some ideas of things you can make for those last minute gifts, instead of running out to the store in a frenzy. These ideas are easy and inexpensive.
I made these for my son's 2nd birthday, and they were a huge hit. Now if only I could find the baseball and football...
For these I traced a 5" bowl and cut out two circles of fabric and two circles of interfacing for each. Iron one piece of interfacing to the wrong side of each fabric piece. Next, you add the details for each of the different balls. First use a fabric marker to mark the lines. For a basketball, baseball, or football, use a tight zig-zag stitch (the 2nd to smallest your machine will do) and just follow the lines on the fabric. For the soccer ball, I cut out 10 pentagons of black fabric, 5 for each side of the ball, and used a larger zig-zag stitch to applique them on.
Next, just put the two fabric pieces together, right sides facing, and sew around the circle leaving a small opening for turning. Turn the ball the right side out and fill. You can use rice, dried bean, etc. but I chose to use Poly Pellets so the balls would be washable. Lastly, just stitch the opening closed.
I cut strips of fabric about 1-1.25" wide by 4.5" long, batting 4" square, and backing 4.5" square. Lay your first strip of fabric, right side up, on top of your batting, overlaying the fabric about 1/4" around the edges of batting (so that the batting doesnt cause extra bulk in the 1/4" seam.) Lay the second piece of fabric right side down on the first piece, lining up the edge with the first fabric and stitch a 1/4" seam allowance, going through the two fabrics and the batting (the two fabrics on top right sides together and batting on the bottom.) Fold the 2nd fabric open and press.
Keep adding more pieces of fabric until your coaster is covered. Square up the top, by triming any excess on the edges. Next place the pieced top, right sides together with the backing material and sew around the coaster, leaving a small opening for turning. Clip the points off of the corners (to eliminate bulk) and turn the coaster right side out. Iron flat and stop stitch around the edge with a 1/8" seam.
For ideas on other fabric coasters, visit the Sewn Fabric Coasters Flickr Group.
I hope these tutorials help you with this crazy time of year! I wish you all a very merry Christmas! And I cant wait see you back here in the new year with many more great tutorials and ideas for you to try out!
Bean Bag Balls
These are great for those sport-loving kiddos who cant live without a ball in hand.I made these for my son's 2nd birthday, and they were a huge hit. Now if only I could find the baseball and football...
For these I traced a 5" bowl and cut out two circles of fabric and two circles of interfacing for each. Iron one piece of interfacing to the wrong side of each fabric piece. Next, you add the details for each of the different balls. First use a fabric marker to mark the lines. For a basketball, baseball, or football, use a tight zig-zag stitch (the 2nd to smallest your machine will do) and just follow the lines on the fabric. For the soccer ball, I cut out 10 pentagons of black fabric, 5 for each side of the ball, and used a larger zig-zag stitch to applique them on.
Next, just put the two fabric pieces together, right sides facing, and sew around the circle leaving a small opening for turning. Turn the ball the right side out and fill. You can use rice, dried bean, etc. but I chose to use Poly Pellets so the balls would be washable. Lastly, just stitch the opening closed.
Coasters
These are so incredible easy to make and only use small scraps of fabrics. It would also be great to use non-Christmas fabrics for year round use. And you can make them whatever size you want. Mine ended up around 4".I cut strips of fabric about 1-1.25" wide by 4.5" long, batting 4" square, and backing 4.5" square. Lay your first strip of fabric, right side up, on top of your batting, overlaying the fabric about 1/4" around the edges of batting (so that the batting doesnt cause extra bulk in the 1/4" seam.) Lay the second piece of fabric right side down on the first piece, lining up the edge with the first fabric and stitch a 1/4" seam allowance, going through the two fabrics and the batting (the two fabrics on top right sides together and batting on the bottom.) Fold the 2nd fabric open and press.
Keep adding more pieces of fabric until your coaster is covered. Square up the top, by triming any excess on the edges. Next place the pieced top, right sides together with the backing material and sew around the coaster, leaving a small opening for turning. Clip the points off of the corners (to eliminate bulk) and turn the coaster right side out. Iron flat and stop stitch around the edge with a 1/8" seam.
For ideas on other fabric coasters, visit the Sewn Fabric Coasters Flickr Group.
Black Apple Dolls
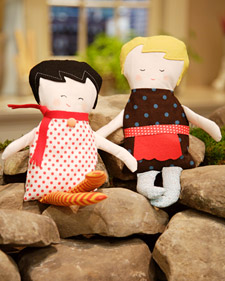
These new modern-faced dolls are all the rage. The Black Apple brand originated on etsy as artwork. I was so excited when I saw that Martha Stewart crafts showcased these dolls, with templates included! They are soo simple and can be made in so many different ways by changing the hair color, facial expression, accessories and clothing, you might find yourself making these every year. No little girl would ever get tired of them! Click here to go to the tutorial.Fabric {paper} Chain
Paper chains are a favorite around the holidays for children. Why not make them more eco-friendly, much more attractive, and not have to re-cut those darn paper strips every year (I dont know about you, but I hate having sore-scissor hand!) Ashley from Film in the Fridge was brilliant when thinking of these. Just small fabric tubes with velcro! I cant wait to make one next year. These would also be great to use with kids for counting down to any exciting event, like birthdays, other holidays, and vacations! Click here to go to her tutorial.Fabric Alphabet
A GREAT educational homemade gift! This would make a great gift for kids aged 1-5 years old. They can be used to learn letters, sounds, the alphabet, spelling and much more. These do take a little time to make, but are well worth it. I've just made the A and B so far, but am planning to finish the rest of the alphabet for a Christmas gift to my son. To make these just use any word processing software ( like Word) and print out the alphabet in large letters (I did mine landscape with two per page, so they're about 7" tall.) Layer your top fabric, batting (cotton preferably), and a backing material (I use inexpensive white muslin.) Trace your letter on the material and cut a 1/4" outside the lines, cutting all three layers at once. Stitch on your drawn line, then cut slits all along the edge, cutting as close to the stitching line as possible without actually cutting through your stitches. Wash and dry to get the nice ragged edge.I hope these tutorials help you with this crazy time of year! I wish you all a very merry Christmas! And I cant wait see you back here in the new year with many more great tutorials and ideas for you to try out!
Wednesday, December 9, 2009
Quilting using a Walking Foot
I wish someone would have opened my eyes up to the wonders of the walking foot a long time ago. It's not just for quilting. It's great to have for many other sewing/crafting projects. In really basic terms, it helps feed all the layers through your machine evenly. When sewing with a regular presser foot, your bottom layer is pulled through with the feed dogs but your top layer is dragged beneath the presser foot. A walking foot raises itself up and then sets back down with every stitch of the needle. So the top layer is feed through at the same rate as the bottom. It is especially great to use with fabrics that are stretchy.
If you haven't worked your way up to free-motion quilting, you can still easily quilt your own quilts, instead of paying some else to do it or tying them. In fact, a lot quilters use a combination of free motion quilting and straight stitching (with a walking foot or darning foot.)
It is so incredibly easy to quilt using the walking foot. If you can sew a straight line (or not even a straight one!), you can quilt. That's all there is to it. Below are some quilting examples that can be done using a walking foot. (Look closely at the stitching to pick out the different quilting styles.)
Tuesday, December 8, 2009
New to the Shop!!
I've had these floating around in my head for a while now and have finally made them. Enjoy!
Tuesday, November 17, 2009
And the winner is...
commenter #10...Mubeen!
Congratulations Mubeen! You should have received an email from me with the good news.
I will definitely be doing more giveaways in the future. Probably once a month, either here or on other sites. I'll be sure let you know when and where to enter. Thanks to everyone who participated!
Congratulations Mubeen! You should have received an email from me with the good news.
I will definitely be doing more giveaways in the future. Probably once a month, either here or on other sites. I'll be sure let you know when and where to enter. Thanks to everyone who participated!
Thursday, November 12, 2009
I'm back!....with a GIVEAWAY!
October was a long, hard month for me with going through a couple heartbreaking experiences, plus moving. So to celebrate my return to blogging, sewing, and life as we all know it, I'm offering a giveaway! Yea! It is one of the most popular items from my shop:
To enter, just leave a comment. But that's not all! For a 2nd entry, become a follower of my blog. And a 3rd, follow me on Twitter. For a 4th entry, subscribe to the blog. And even a 5th, blog about my giveaway, linking back to this post. If you dont want to take advantage of all of these options, you are welcome to pick and choose which ones you'd like to participate in. Just leave a separate comment for each entry letting me know which ones you've completed. Also, you must leave an email address to be contacted at.
The giveaway will close Sunday, Nov 15 at 12pm (CST). So enter quick!
Monday, September 14, 2009
Practice Makes perfect
I am so sorry I have taken forever to get to this. We've had some fun-packed last couple weeks of summer. And I had so much floating around in my head for this post, I didnt know where to start.
First off, to "quilt" your doll quilt in the stippling method I used, you will use a Darning Foot (which is used for all free motion quilting.)
I highly recommend taking a Beginner's Quilting class at your local quilt shop. That's what I did, and I loved it. I learned so much more than I thought there ever was to it, and not to mention had a ton of fun having a "me" day and socializing with all the other quilters there.
The key to learning how to quilt is practice, practice, practice. In the class I took, we prepared a quilt sandwich that was 24"x24" out of scrap batting and two inexpensive pieces of muslin. I think this is a really great way to learn and practice, so I encourage all of you interested in learning to try this out.
Start out by using your walking foot (more on the walking foot to come) to sew straight lines down the center of each side, dividing the 24" square into four 12" sections. Using a walking foot I'd say is the easiest way to quilt, so in class that's what we started with.
To do a grid pattern, use your quilting ruler and fabric marker to draw one line on the fabric to follow while sewing. Sew you first line directly on your marker line. Next just move over however far apart you want your spacing to be (mine is 1" here) and using your first sewn line as a guide, simply stitch the next row. Then just keep going, using the last row sewn as a guide for the next.
I know what you're thinking. You dont have to be perfect for this to turn out well. In fact, it hides mistakes very well. In the picture you can easily pick out my mistakes, but I promise, in real life they are totally hidden. Not to mention that fact that it helps to use matching thread (instead of dark blue thread on white cloth like I did! But you can definitely see it.)
Next up is one of my favorites. Im not sure of the name but it's really fun and super easy. It's all just eye-balled. Just start out at whatever spot you'd like, and using your walking foot, just quilt as if you were sewing straight lines. But instead of holding the fabric still, turn it from side to side to make the lines curvy. And you really have to move it around quite a bit. I cant wait to do this on a really cute kids quilt.The next two sections, we used the Darning foot. In one section we did stippling (looks kinda like puzzle pieces) and the other was loops. I didnt take a close up pic of my stippling because it was hideous, but you can see it in the first picture. The loops were pretty easy, but for reason I really dont care for them too much. I quickly moved on to trying out other things. Can you see the flowers, leaves and ivy, my name, and stars that I did? I was quite proud of my self for it being my first time free motion quilting.
Before trying my hand out again at the stippling, I definitely needed some help. I just couldn't wrap my mind around making a random pattern and still starting and finishing at a designated spot. Using a pen and paper helped immensely! Just some old computer paper and sharpie did the trick for me. It finally clicked in my brain.
Now it's time to practice again using more scrap fabric and batting. Another big part of free motion quilting is the coordination to move the fabric at the correct speed as you press the peddle to make the needle goes up and down to stitch. You dont want your stitch length to be too long or too short. Now get out there and practice, practice, practice!Amandajean over at Crazy Mom Quilts has another great tutorial on free motion quilting with a video.
Sunday, September 13, 2009
Baby shower gift
We had a baby shower for my cousin, and I actually planned well in advance for this one, so I had plenty of time to give a homemade gift. I started out with the intent of make a doll quilt and a couple other matching baby items to go with it.
I tried out a quilt block I hadnt done before. But I didn't realize how large the block actually was, so by the time it all came together, it was a bit larger than a doll quilt. That's ok though. It can be used as a play mat, diapering pad, or baby carrier blanket for the little cutie until she out grows it and can use it on her own dolls. Then I put together the matching bib and ribbon ball with the leftover fabric.
The moment the windmill blocks came together, I knew I had to outline them with my quilting.
I love how on the backing, it had "embossed" windmills and the design from the quilt front is transferred to the back also.
Then to finished it off, I did little loops for the rest of the quilt. Kind of like wind gushes from the windmills.
Tuesday, August 25, 2009
I've been featured!
I was so excited to see I made it into my first treasury over at Etsy. Click here to check it out. It's a compilation of Modern Mom's Must Haves. I have to admit, this item/fabric combo is one of my current favs.
Wednesday, August 19, 2009
"Quilt Sandwich"
To prepare your quilt top to be made into a full blown quilt, you'll need to make a "quilt sandwich." And basically what that means is putting all your quilt layers together in preparation for quilting them together (either by hand or machine.)
Sorry I didn't take many pictures of this process, but it's pretty easy so hopefully you'll still get the idea.
To start, lay your backing fabric face down. Since we are working on a small doll quilt, your cutting mat is a great spot to use. If you are working on a larger quilt, use the floor or a large tabletop (but make sure the floor or table are surfaces you don't mind getting scratched up.) Smooth the fabric out. Then place pieces of blue painters tape around all sides, taping the fabric to the work surface, to hold the fabric taut. Be careful not to stretch or pull the fabric. You just need it taut so it doesn't wrinkle or move around under the other layers.
Next smooth out your batting on top of the backing fabric. Batting and cotton magical "stick" together, so no more tape will be needed.
Now lay your quilt top on top of the batting, smoothing it out. Be careful to keep all your pressed seems in their proper place and not flipped over. Also double check to make sure the backing fabric and batting are underlying the entire quilt top. It's important to always cut your batting and backing fabric 2-4" larger on each side to allow for any variance, especially once it's getting quilted. (An easy way to do this is simply lay your quilt top on top of the batting or backing fabric, then using hand scissors, eyeball the extra 2-4" on each side and snip away the batting or backing. It doesn't need to be perfect, because the excess with get trimmed away later.)
The final step is to pin it all together. Using bent quilting safety pins, pin through all the layers.
Place pins approximately 5" apart, which is about the size of your fist. Also, vary the pin placement, row by row. See picture below.
Again, if you're sandwiching anything larger then a doll quilt, this next tool is your best friend. It is used to close the safety pins. Do it once without it, and you'll know what I mean when you wake up the next morning with busied finger tips. It's very inexpensive and can be found at every quilting store.
And that's it. You're done. Just remove the tape from the backing fabric.
In my next couple posts, we'll talk about machine quilting. This is a new topic for me, so I'm in that exciting and giddy phase.
Also if you took a closer look at my quilt sandwich above, you may have noticed that I pieced my batting. We'll talk about that later too.
Tuesday, August 18, 2009
Monday, August 17, 2009
Doll Quilt Tutorial
Making doll quilts are my favorite way to practice quilting. In this doll quilt, Im trying out the string block. Click here to see my tutorial on how to make the string block.
For the doll quilt, you'll need 4 string blocks. Lay the blocks out, deciding which positioning you like best.
Then sew the top and bottom pieces together using a 1/4" seam. Because of the bulkiness of this type of block, I recommend ironing your seams open. Once that's done, sew the right and left halves together and press the seam open.
Next, we'll add a border. I wanted mine to be 2.5" finished, so I cut my border pieces 3" wide (allowing for a 1/4" on both sides.) For length, measure your blocks. I like to make my borders 1/4" longer than needed, just to make sure it fits.
With the border pieces on the top and bottom, square up the block, cutting off the excess edges on the borders. To do this, line up a long ruler, matching the edge of the string blocks at the top and bottom corners, and using your rotary cutter, trim the border edges
Next we'll need to add the left and right side borders. The width of these will be the same as before, but the length will change. To find the length, simply measure your quilt again, this time including the borders you've just attached (measure from the outside edge of your top border down to the very bottom of your lower border.) Once all the borders are added, square it up again.
Now that all the edges of the blocks have been sewn, you can remove the paper. Be gentle so you dont rip out any seams or damage any fabric. If you used a small stitch length it should come off really easily. If not, then it will just take little bit more time and you'll have to be very careful as to not to not cause any damage. Also, if you went overboard with the glue when making the string block and are having a hard time getting the paper to separate from the fabric strip it was glued to, just dampen the fabric a tiny bit with your finger that's been dipped in water. It wont take much to get the glue to dissolve.After the trauma of removing the paper, press the quilt top again.
Next up, I'll show you how to make the "quilt sandwich" and machine quilt it, then add the binding.
Saturday, August 15, 2009
sew4home nursery sewing
sew4home is hosting a segment on designing a stylish baby nursery. All of the fabrics they use come from the Andalucia collection by Patty Young from Michael Miller fabrics, which I haven't loved so much until I sew them put into action in the nursery. I absolutely love all the bright girlie colors and am really tempted to start working on nursery items for my future baby girl (if I am ever fortunate to have one someday!)
Like these gorgeous crib bumpers!Or these oh-so-useful collapsible storage binsCheckout the list of everything else they have in store for the stylish nursery here.
and the best part is that they have tutorials for all of it!
Like these gorgeous crib bumpers!Or these oh-so-useful collapsible storage binsCheckout the list of everything else they have in store for the stylish nursery here.
and the best part is that they have tutorials for all of it!
Friday, August 14, 2009
$50 gift certificate giveaway
The Quilt Shoppe is celebrating their 2nd birthday. And Rachel at p.s. i quilt is hosting a giveaway of a $50 gift certificate to the Quilt Shoppe. So everyone be sure to head over to p.s. i quilt to enter! Good luck!
Thursday, August 13, 2009
String Block Tutorial
I've recently seen other quilting bloggers post about string block quilts. Now that I've been sewing for a few years, I finally have enough scraps to start on some stash busting projects. I definitely wanted to try my hand out on the string block, and now it's one of my favorites.
Here's my two cents in a little tutorial to get you started on your own stash busting project.
This is a paper-pieced block, so start by cutting a square piece of paper to use as the foundation for your block. I used regular ol' printer paper, but you can use just about any paper you have on hand, just make sure it's not a thick paper. I've heard phone book pages work well too.
I have a lot of smaller scraps so I'm making my blocks a little smaller, at 6 inches square. You can make your blocks any size you want, up to 12 inches.Next, cut a strip of solid colored fabric (or a print if you'd like) that is long enough to reach all the way from one corner to the other, diagonally across the paper block. The length does not have to be exact, just make sure it fully covers both corners. You do need to make sure the width is exact though - making sure both side are cut straight and has the same width the whole length of the strip. The middle strips are the only ones that will line up when you put multiple blocks together. My white strips are cut 1 in. wide.
Draw a thin line down the center of the strip with a fabric pen or pencil. Using a fabric glue stick (or any washable glue stick) apply a thin amount of glue down the diagonal of the paper block. Dont go overboard on the glue or you will have a heck of a time removing the paper later.Next, lay the white strip of fabric on top of the glue line. Make sure the line drawn on the fabric crosses exactly over the corner. Press the fabric down to make sure it is fully adhered to the block. Here's a close up of how the line should pass perfectly over the corner on both ends.Now we will apply the printed fabrics on both sides of the solid to fill up the rest of the block.
To start out, cut a printed fabric to any width, just make sure both sides are cut straight and that it will reach all the way across the block diagonally.Lay the print facing down on the white strip matching up one long side.
DECREASE the stitch length on your sewing machine in order to perforate the paper when sewing. I set my machine at 1. (It definitely takes a bit longer to sew at such a short stitch length, but it will be well worth your time when you're rippin' off all that paper later. It will be MUCH easier and put less stress on the stitches and fabric. Believe me, I learned the hard way!) Sew a 1/4 in. seam down the edge of the fabric pieces, going through the fabrics AND the paper.Fold the printed fabric over and press.Do the same to the other side of the white strip.And just keep going to cover the rest of the paper block, making sure to vary the widths of the strips. Align the long edge of the next strip with the last strip on the block, just as before with right sides together using a 1/4" seam sewing through the fabrics and paper. Do this on each end of the block, moving away from the center.
Since each strip will have a 1/4" seam on both sides (making a 1/2" total taken away by seam allowances) I would recommend keeping your cut widths between 1" (so the smallest strip will have a 1/2" visible area) to 2". But if you are making a larger block size, like a 12" block, you could definitely use even wider strips.
Once your block is covered, flip it over to the back side and using the paper as a guide, trim the excess fabric.And voila! Your done! Pretty easy. But dont be too excited just yet to start rippin' away all the paper. Remove the paper only when all four sides have been sewn to an adjoining block or border. Then have fun, but be gentle. It should come off really easily if you used a short stitch length.
I love quilt blocks that you don't have a hundred corners to line up. I cant wait to make a bunch more of these! I used fabrics all from the same line (Sweet Escape from Free Spirit.) Make your blocks more scrappy by using any of your scraps from your stash. See examples here, here, and here.
I'd love to hear any questions or comments you may have. If you make anything from my tutorials, I'd love to see it! Post your pictures to the Zanie Zoo flickr pool.
My next tutorial will show you how to combine four string blocks to make a doll quilt. Here's a sneak peak so you get an idea of what it looks like with multiple blocks sewn together.
Subscribe to:
Posts (Atom)